Schneider LC1D Contactor Wiring Tips for Optimal Performance
When it comes to industrial automation, choosing the right components and knowing how to wire them correctly are essential for your operations. Schneider’s LC1D contactor series is a popular choice in both Southeast Asia and global markets. This post will cover everything you need to know about Schneider LC1D contactor wiring, including tips for installation, troubleshooting, and best practices in maintenance. Understanding the basics of Schneider LC1D contactors can save you time and reduce downtime in your projects, making it necessary for maintenance teams and buyers to be well-informed.
Understanding Schneider LC1D Contactors
The Schneider LC1D contactor is a robust and reliable component widely used in industrial applications for controlling electrical circuits. These contactors operate at various voltages (from 24V to 500V AC) and are designed for both AC and DC supplies.
Wiring Connections
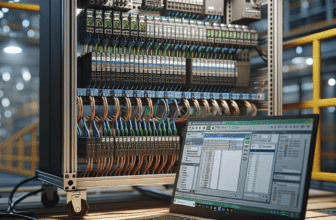
Wiring the LC1D correctly is vital for optimal function. The standard wiring configuration employs terminal connections labeled L1, L2, and L3 for incoming line wires, and T1, T2, and T3 for load wires. It’s also crucial that you choose appropriate terminal options such as screw terminals, Faston connectors, or spring terminals according to your needs.
| Wiring Terminal | Description | Recommended for |
|---|---|---|
| L1-L2-L3 | Incoming power wires | Standard configurations |
| T1-T2-T3 | Load connections | Connecting to the load |
| Screw Terminals | Commonly used, allows for secure wiring | Most installations |
| Faston Connectors | Quick connection, 6.35mm on power poles | Easy maintenance |
For further reading on wiring methods, visit the Schneider LC1D wiring guide.
If you’re planning to purchase Schneider LC1D contactors, check them out in our store: Shop this category.
Control Circuit Voltage
The control circuit voltage is an essential part of the reference code, such as LC1D09M7 which signifies a 220V AC coil. These coils come with built-in suppression for both AC and DC supplies.
Installation and Mounting Tips
Mounting Options
One of the critical aspects of installation is the mounting options available for the Schneider LC1D. You can choose from clip-on mounting on 35mm or 75mm DIN rails. However, larger models such as D115 and D150 require two 35mm rails for secure mounting.
| Mounting Method | Description | Suitable Models |
|---|---|---|
| Clip-on DIN rail | Standard installation | LC1D series |
| Screw fixing | For more robust setups | All model types |
| 2x35mm rails | For larger models | D115, D150 |
To enhance the safety and functionality of your setup, consider adding auxiliary contacts like the LADN. These blocks are ideal for interlocking applications, but note that dimensions increase when you add them (for example, the height increases to 117mm with the LADN included).
For more on auxiliary contacts, refer to the specifications here: Schneider Auxiliary Contacts.
Don’t forget, we offer Free standard shipping on orders to the US/CA/AU/UK and a 14-day return window for your peace of mind.
Troubleshooting Common Issues
For effective maintenance, familiarize yourself with some common troubleshooting steps for Schneider LC1D contactors. Common issues can often be resolved quickly if you’re prepared.
Common Problem Areas
| Issue | Potential Causes | Easy Fixes |
|---|---|---|
| Coil Failure | Lack of continuity | Check the resistance |
| Overload Trips | Incorrect settings | Verify the settings match motor FLA |
| Contact Welding | Mechanical wear | Inspect contacts visually |
| Wiring Errors | Loose or incorrect connections | Double-check phase rotation |
Measuring coil resistance can provide insight into whether your unit is functioning correctly. If your resistance is beyond the acceptable range, it might indicate a failure.
For high-current applications, such as with models D80-D95, using 2x4mm² cables in parallel may be necessary to handle the power load effectively.
For troubleshooting guidelines on overloads and general contactor failure, refer to graphs and detailed specs here: Schneider LC1D Datasheet.
Ready to experience hassle-free maintenance? Grab all your Schneider parts from our store: Shop all parts.
Conclusion and Best Practices
In summary, Schneider LC1D contactors are an excellent choice for various industrial applications due to their flexibility and reliability. It’s crucial to properly wire, mount, and troubleshoot these components to ensure longevity and performance. Make sure you stock up on the necessary parts and tools you need to maintain your systems effectively.
For any inquiries or assistance in selecting the right products, do not hesitate to Contact us. Your operational efficiency is our priority!
FAQs
- What voltage options are available for Schneider LC1D contactors?
Schneider LC1D contactors operate with coils ranging from 24V to 500V AC and specific DC voltages like 12V-440V. - How do I properly mount the Schneider LC1D?
You can use clip-on 35mm or 75mm DIN rails, and larger models require 2x 35mm rails. Be sure to follow the guidelines for mounting included in the technical documentation. - What should I check if the contactor isn’t operating?
First, ensure that the coil has continuity. If not, replace it. Verify that your control voltage is within the recommended 85-110% of Uc. - Are auxiliary contacts necessary?
Auxiliary contacts can enhance the functionality of your contactor, particularly if interlocking is required for your application. However, they are not strictly necessary for all setups. - What is the return policy?
We offer a 14-day return window for returned items. Please refer to the Returns & exchanges page for more details.
In closing, knowing how to wire, mount, and troubleshoot Schneider LC1D contactors will vastly improve your ability to manage your industrial automation systems efficiently. Don’t forget to check out our complete range of parts and accessories!